Claim Your Free Roof Upgrade Offer Today
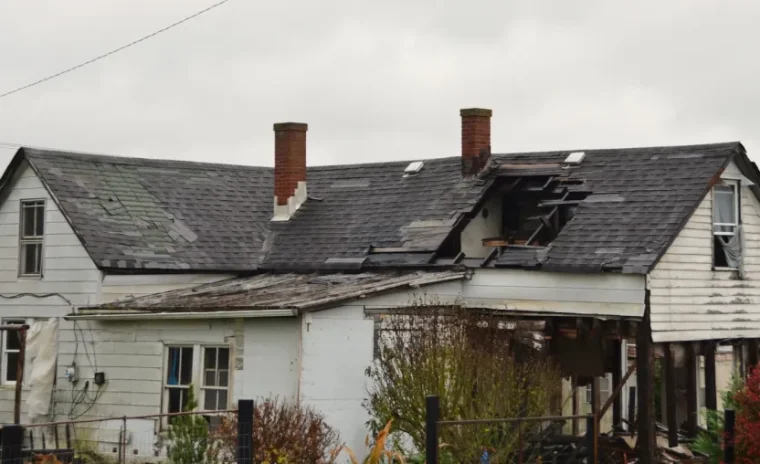
How to Inspect Your Roof for Storm Damage After Severe Weather
How to Safely Prepare for Your Roof Inspection
Storm damage assessment begins long before you set foot on a ladder. Proper preparation protects both you and your property, ensuring you gather accurate information while avoiding unnecessary risk. In Spencer and the surrounding Indiana communities, severe weather including thunderstorms, high winds, and occasional hail events can strike between late spring and early fall, making timely inspection critical to preventing long-term structural issues.
Your safety is the absolute priority. Roof inspection requires specific conditions and equipment. Wait at least 24 to 48 hours after a storm before attempting any inspection. Wet roofing materials remain slippery and structurally compromised, and hidden moisture can obscure damage indicators. Check the weather forecast to ensure clear, dry conditions for at least several hours. Avoid inspecting during extreme temperatures, as both heat exhaustion and cold-induced brittleness create hazards.
Gather the proper tools before beginning. You will need high-quality binoculars for ground-level observation, a digital camera or smartphone for documentation, a notepad for recording findings, and sturdy footwear with excellent traction. If you plan to access the roof, a properly rated ladder, safety harness, non-slip shoes, and a partner to stabilize the ladder are non-negotiable. Many homeowners in Bloomington and Bedford discover that the investment in safety equipment outweighs the risk of injury or incomplete assessment.
Understand your limitations. Steep-pitched roofs, roofs higher than one story, and any roof showing visible structural sagging require professional evaluation. Older roofs, those with existing damage, or materials you are unfamiliar with also warrant calling a roofing contractor immediately. Age and physical ability matter. If you have mobility concerns, balance issues, or any medical condition that could be affected by height or exertion, professional roof inspection services are the safer choice.
Before climbing anywhere, inform someone of your plans. Establish a clear timeframe and check-in protocol. Keep your phone accessible. Review your homeowner’s insurance policy to understand your coverage for storm damage and the documentation requirements for filing a claim. Many insurance companies require prompt reporting, so knowing your deadlines helps prioritize your inspection timeline. If you feel uncertain at any point during preparation, a qualified storm damage roofer can provide a thorough assessment without the personal risk.
Identifying Common Storm Damage from Ground Level
Ground-level observation is the safest and most accessible first step in assessing storm damage. Most significant issues are visible from the ground with careful attention and proper magnification. Position yourself at multiple vantage points around your property, ensuring you view all roof sections, including areas obscured by trees or structures. Binoculars allow close examination without the risks associated with ladder work.
Begin by evaluating the roof’s overall profile. Look for sagging, dips, or uneven lines along the ridge and eaves. These indicate potential structural damage to the decking or support beams. In areas around Spencer where older homes feature traditional framing, even minor sagging can signal water intrusion or compromised load-bearing elements. Check for missing, cracked, or curling shingles. High winds frequently lift shingle edges, and hail impacts create visible bruising or punctures. Asphalt shingles may show dark spots where granules have been dislodged, exposing the underlying mat.
Pay close attention to vulnerable transition points. Valleys, where two roof planes meet, channel water and are particularly susceptible to damage. Flashing around chimneys, vents, skylights, and dormers should lie flat and intact. Bent, lifted, or missing flashing invites water penetration. Examine roof penetrations such as vent pipes, checking for cracked boots or damaged seals. In many Bloomington-area homes, older flashing materials deteriorate over time, and storm events accelerate failure.
Inspect your gutters and downspouts thoroughly. Granule accumulation in gutters signals advanced shingle wear. Dents in metal gutters or downspouts indicate hail impact, which often correlates with roof damage. Look for debris buildup, sagging sections, or detachment from fascia boards. Functional gutter services are essential to directing water away from your foundation, and storm damage here compounds roofing issues.
Examine the ground around your home’s perimeter. Shingle fragments, granules, or pieces of flashing scattered in your yard confirm material loss. Check for dented siding, damaged window screens, or marks on outdoor fixtures, all of which suggest hail severity that likely affected your roof. Document everything with photographs from multiple angles, noting the date and time. If ground-level inspection reveals concerning damage, contact a professional roofing contractor before attempting closer examination.
Conducting a Safe and Thorough Close-Up Roof Examination
If ground-level assessment suggests damage and you have determined that safe roof access is possible, a close-up examination provides the detail needed for accurate evaluation. Only proceed if your roof is low-pitched, structurally sound, completely dry, and you have the appropriate safety equipment. Position your ladder on stable, level ground, extending it at least three feet above the roofline. Secure the base and have a partner hold it throughout your climb. Wear rubber-soled shoes with strong grip and avoid stepping on wet, mossy, or visibly damaged sections.
Once on the roof, move methodically and distribute your weight carefully. Walk on the flat, structurally supported areas, typically along the roof’s peak or over rafters. Avoid the edges and valleys. Examine shingles closely for several types of damage. Hail creates circular indentations, often with a soft or spongy feel when pressed gently. Wind damage appears as lifted, torn, or completely missing shingles. Aging accelerates both issues. In the Spencer region, temperature fluctuations between seasons cause shingle brittleness, making storm damage more severe.
Inspect the underlayment where shingles are missing. The roofing felt or synthetic barrier should remain intact and smooth. Tears, punctures, or exposed wood decking require immediate attention. Check flashing at every transition point. Chimneys, skylights, vent pipes, and wall intersections all rely on properly sealed metal flashing. Rust, bends, gaps, or lifted edges allow water infiltration. Many homes in surrounding communities feature older step flashing that degrades faster under storm stress.
Valleys demand special scrutiny. These channels concentrate water flow, and any compromise leads to leaks. Look for worn shingles, exposed underlayment, or debris accumulation. Examine ridge caps along the roof’s peak. High winds frequently dislodge these protective shingles, leaving the ridge vulnerable. Evaluate the condition of all roof penetrations, including vent boots, which crack and split over time. Storm impacts accelerate these failures.
Take detailed photographs of every damaged area, capturing wide shots for context and close-ups for detail. Note the location of each issue on a simple sketch of your roof. This documentation is essential for insurance claims and contractor estimates. If you discover extensive damage, active leaks, or structural concerns, exit the roof immediately and contact emergency roofing services. Do not attempt repairs yourself. Professional roof repair services have the expertise, materials, and safety protocols to address storm damage correctly, preventing further deterioration and ensuring warranty protection.
Recognizing Warning Signs Inside Your Home
text:
Interior inspection reveals damage that exterior examination might miss. Water infiltration often manifests inside your home before obvious exterior signs appear. Begin in your attic on a sunny day, allowing natural light to penetrate through any roof breaches. Bring a strong flashlight to illuminate dark corners and structural elements. Look for active water drips, damp spots, or standing water on the attic floor. These indicate immediate leaks requiring urgent intervention.
Examine the underside of the roof decking carefully. Water stains appear as dark streaks, discoloration, or rings on the wood. Fresh stains are darker and may feel damp to the touch, while older damage shows dried, lighter marks. Trace stains upward to identify the entry point, keeping in mind that water often travels along rafters or sheathing before dripping. In Bedford and surrounding areas, homes with older sheathing or insufficient ventilation are particularly susceptible to hidden moisture damage.
Check insulation throughout the attic. Compressed, discolored, or wet insulation loses thermal performance and promotes mold growth. Moldy insulation appears dark, smells musty, and requires removal and replacement. Storm damage often introduces moisture that saturates insulation, creating an environment for biological growth. Ventilation plays a critical role in attic health. Inspect soffit vents, ridge vents, and gable vents for blockages or damage. Proper airflow prevents moisture accumulation and extends roof life.
Inspect the structural framing. Look for sagging rafters, cracked beams, or warped sheathing. These issues suggest significant load stress or prolonged water exposure. Check for daylight visible through the roof, which confirms holes or gaps in the roofing system. Examine the areas around chimneys, vent pipes, and other penetrations from the interior. Gaps, stains, or deteriorated sealing materials indicate flashing failure.
Move through your home’s interior, inspecting ceilings in every room. Water stains on ceilings appear as yellow, brown, or copper-colored rings or patches. Fresh leaks may cause paint or plaster to bubble, sag, or peel. Even small stains warrant investigation, as they indicate moisture penetration that will worsen over time. Check walls adjacent to the roofline, particularly in upper-story rooms. Staining, peeling paint, or visible mold growth on walls suggests water running down from the roof.
Document all interior findings with photographs and notes. The combination of exterior and interior damage provides a complete picture for insurance adjusters and contractors. If you discover mold, extensive water damage, or structural issues, cease your inspection and contact a professional immediately. A qualified roofing contractor can assess the full extent of damage, prioritize repairs, and coordinate with your insurance company to ensure proper restoration. Interior damage is never cosmetic and always requires professional evaluation.
What to Do After Your Inspection: Documentation and Next Steps
After completing your attic inspection, examine every ceiling in your home, particularly in rooms directly below the roof. Water stains often appear as discolored rings or irregular patches, ranging from light yellow to dark brown depending on moisture severity and duration. Pay special attention to corners where walls meet ceilings, as these junctions often reveal the earliest signs of leaks. In older Spencer-area homes, plaster ceilings may show bulging or cracking when water accumulates above, while drywall typically develops soft spots or visible sagging.
Check every room systematically, including closets and less-frequented spaces where damage might go unnoticed for extended periods. Fresh water stains appear darker and may feel damp to the touch, indicating active leaks requiring immediate attention. Old stains that have dried may still signal compromised roofing that will fail again during the next storm. Document the location, size, and condition of every stain you discover, as this information helps roofing contractors trace the leak source during professional assessment.
Interior warning signs extend beyond visible water damage. Musty odors in specific rooms or the attic indicate moisture accumulation even when stains are not yet visible. Peeling paint or wallpaper near the ceiling line often results from humidity changes caused by roof leaks. In Bloomington and surrounding communities where temperature fluctuations are common, ice dams during winter can force water under shingles, creating interior damage that only becomes apparent when temperatures rise.
- Ceiling texture changes: Popcorn ceilings may appear flattened or discolored in affected areas, while smooth ceilings develop rippling or bubbling when water penetrates drywall backing. Run your hand gently across suspicious areas to detect temperature differences or soft spots not immediately visible.
- Wall staining patterns: Water travels along framing members before appearing on finished surfaces, so stains may appear several feet from the actual leak point. Vertical staining down walls typically indicates the leak originated higher on the roof slope, following rafters or studs downward.
- Mold and mildew growth: Black, green, or white patches in corners, along ceiling edges, or around light fixtures signal prolonged moisture exposure. Mold growth requires sustained humidity, indicating chronic leaks rather than single-event storm damage, though severe storms can accelerate existing problems.
Structural concerns visible from inside include sagging ceiling areas, which indicate accumulated water weight or compromised framing. Ridge lines visible from your attic should appear straight; any dipping or waviness suggests structural damage requiring immediate professional evaluation. Roof decking viewed from below should be uniform in color; dark patches indicate water absorption and potential rot. In Indiana’s climate, freeze-thaw cycles accelerate deterioration once water penetrates roofing materials, making early detection particularly important.
If you discover active leaks, place containers to catch dripping water and move valuables away from affected areas. Contact emergency roofing services immediately when water is actively entering your home, as delays allow damage to spread through insulation, electrical systems, and structural framing. Even minor interior signs warrant professional inspection, as visible damage inside typically indicates more extensive roofing problems than initially apparent.